
As you may know when you restore from a Time Machine backup, you can choose to restore all your files, or restore both the Mac operating system (macOS) and all your files.
Restoring all your files
- You should make sure that your Time Machine backup disk is connected to your Mac and turned on. After that you can turn on your Mac.
- Open Migration Assistant, which in the Utilities folder of your Applications folder.
- If your Mac starts up to a setup assistant, which asks for details like your country, keyboard, and network, only you should continue to the next step. The setup assistant includes a migration assistant.
- If your Mac doesn't start up all the way, or you also want to restore the macOS you were using when you created the backup, follow the steps to restore both macOS and your files.
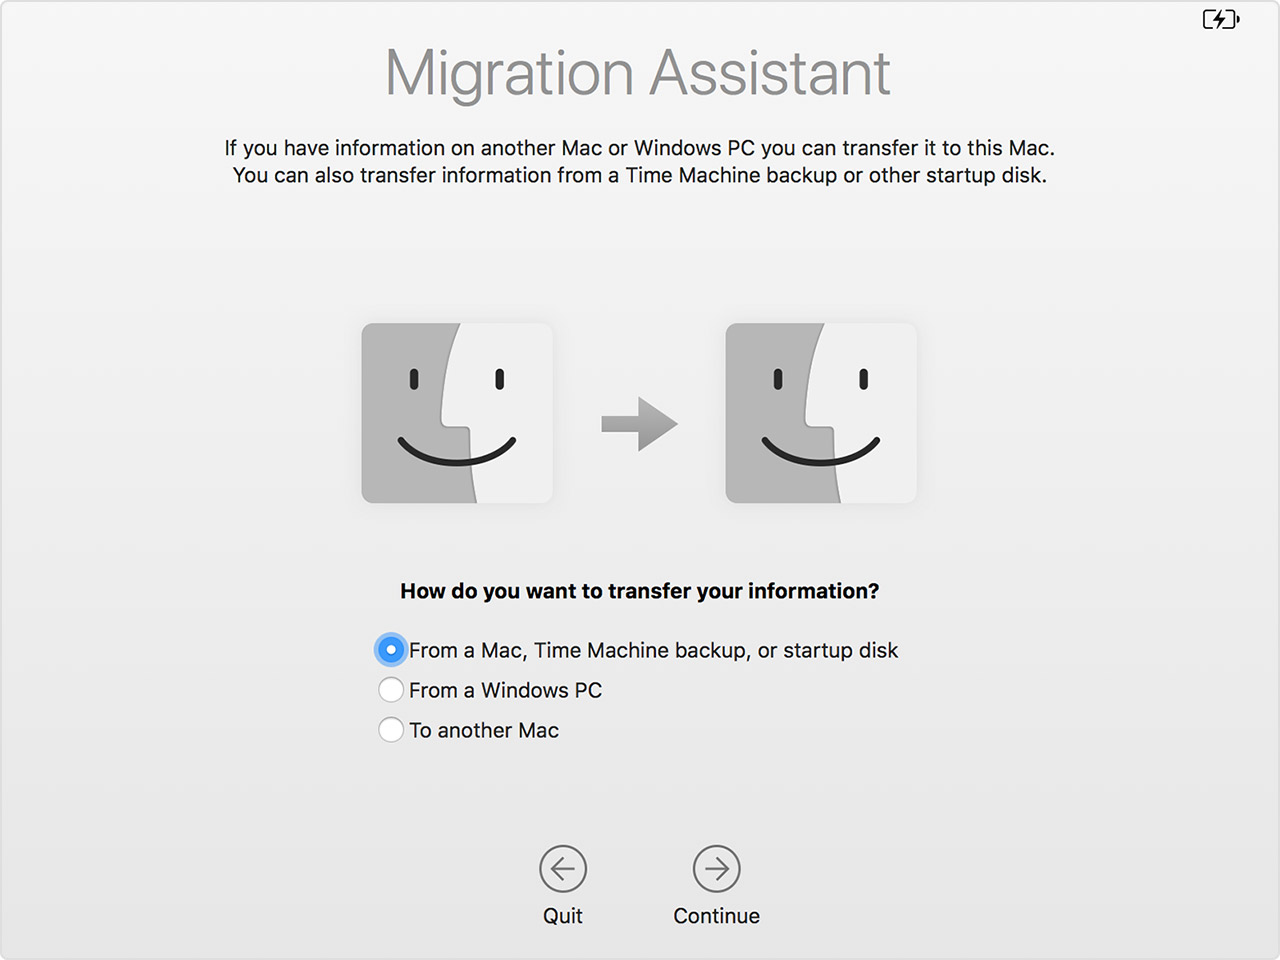
- When you're asked how you want to transfer your information, select the option to transfer from a Mac, Time Machine backup, or startup disk. Then click Continue.
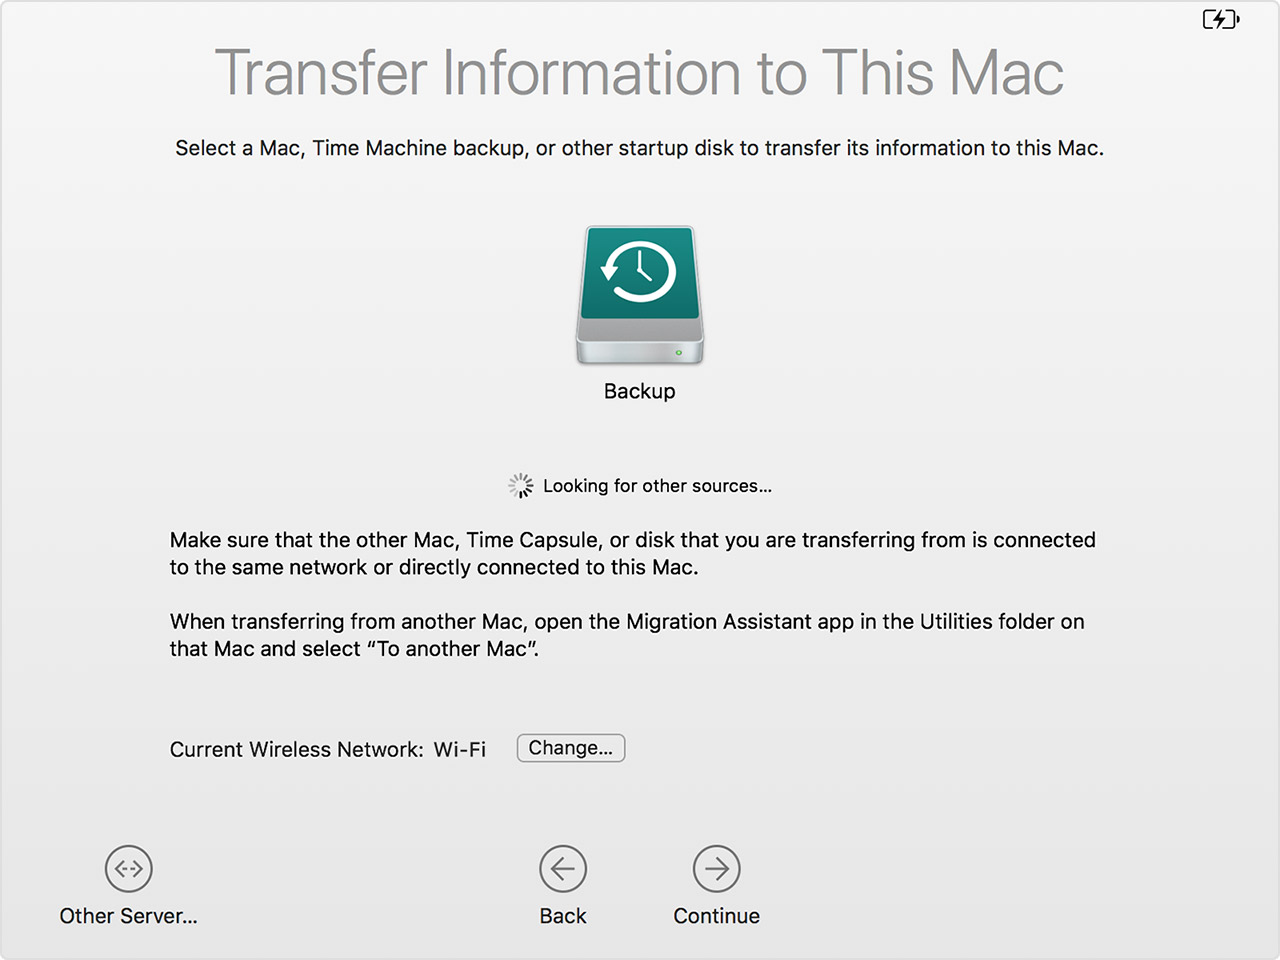
- Choose your Time Machine backup, then click Continue.
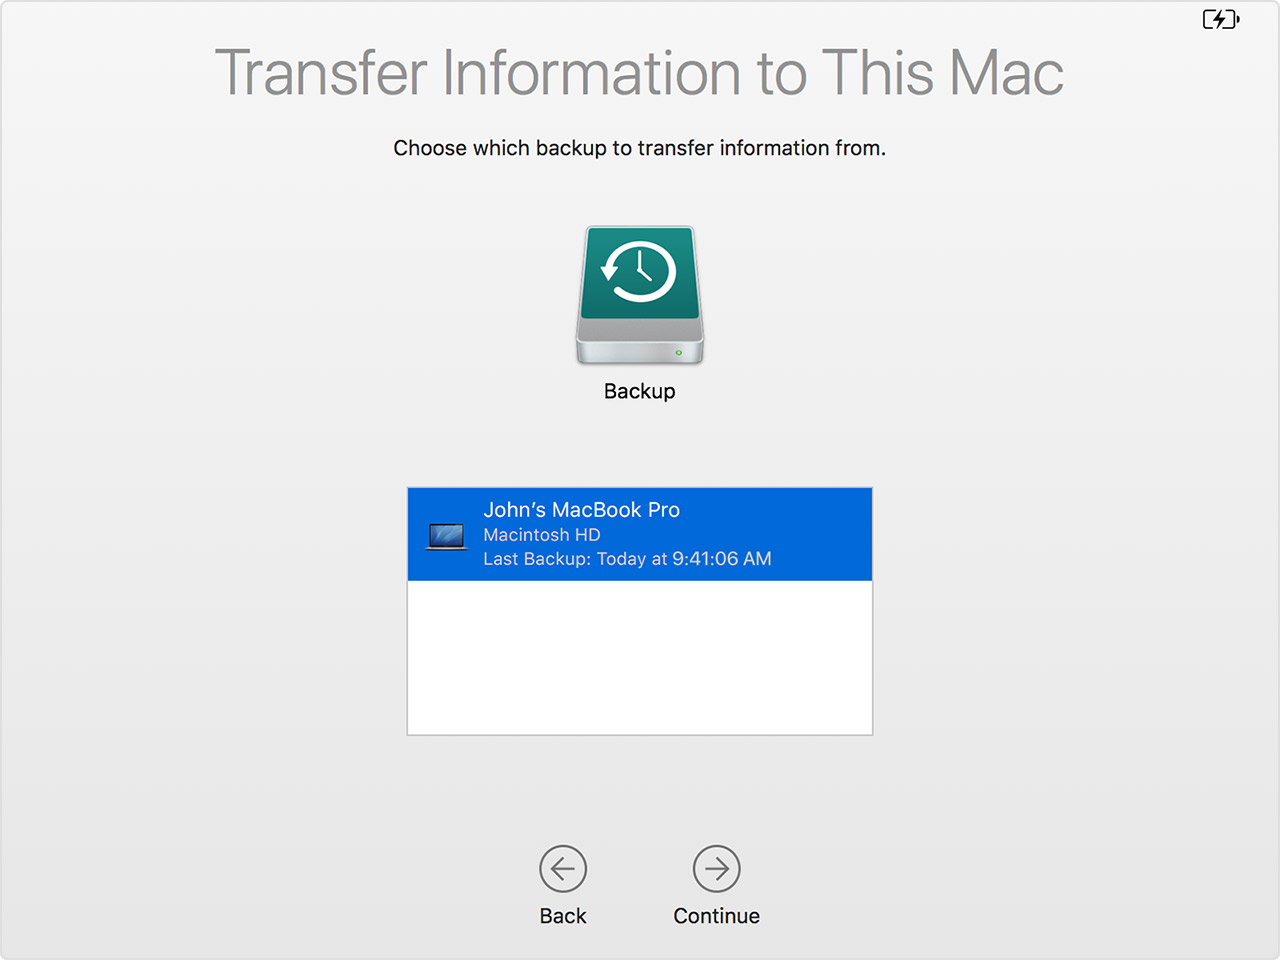
- If you're asked to choose from a list of backups prepared by date and time, choose a backup and click Continue.
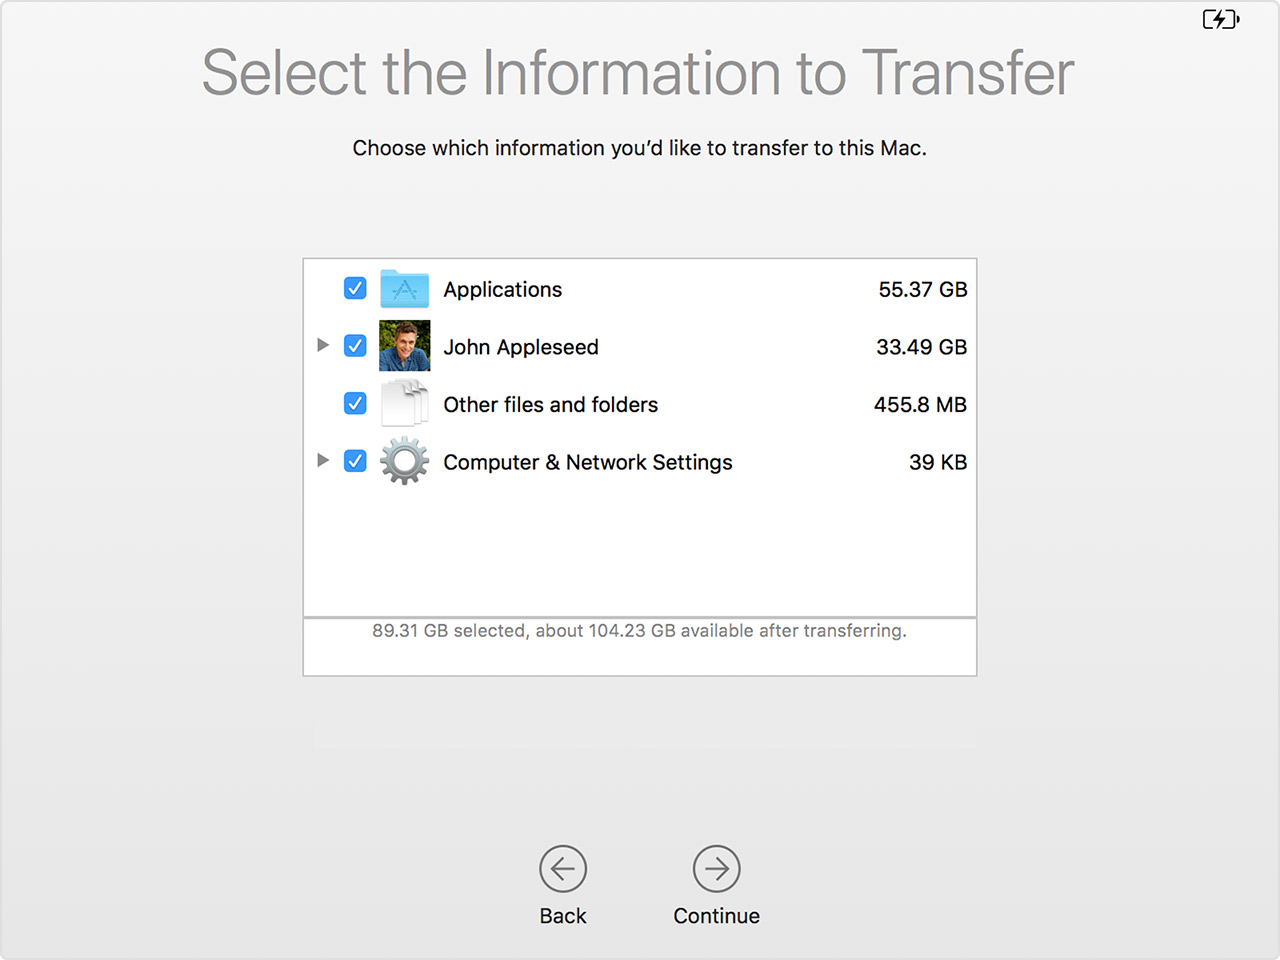
- Select the information to transfer, then click Continue to start the transfer. This screen might look a little different on your Mac:
- If you have a lot of content, the transfer might take several hours to finish. When the transfer is complete, restart your Mac and log in to the migrated account to see its files.
Restore both macOS and your files
- become sure that your Time Machine backup disk is connected and turned on.
If your backup disk isn't available, continue: You might be able to restore from a local snapshot your startup disk. - Turn on your Mac, then immediately press and hold Command (⌘)-R to start up from macOS Recovery. Release the keys when you see the Apple logo or spinning globe.
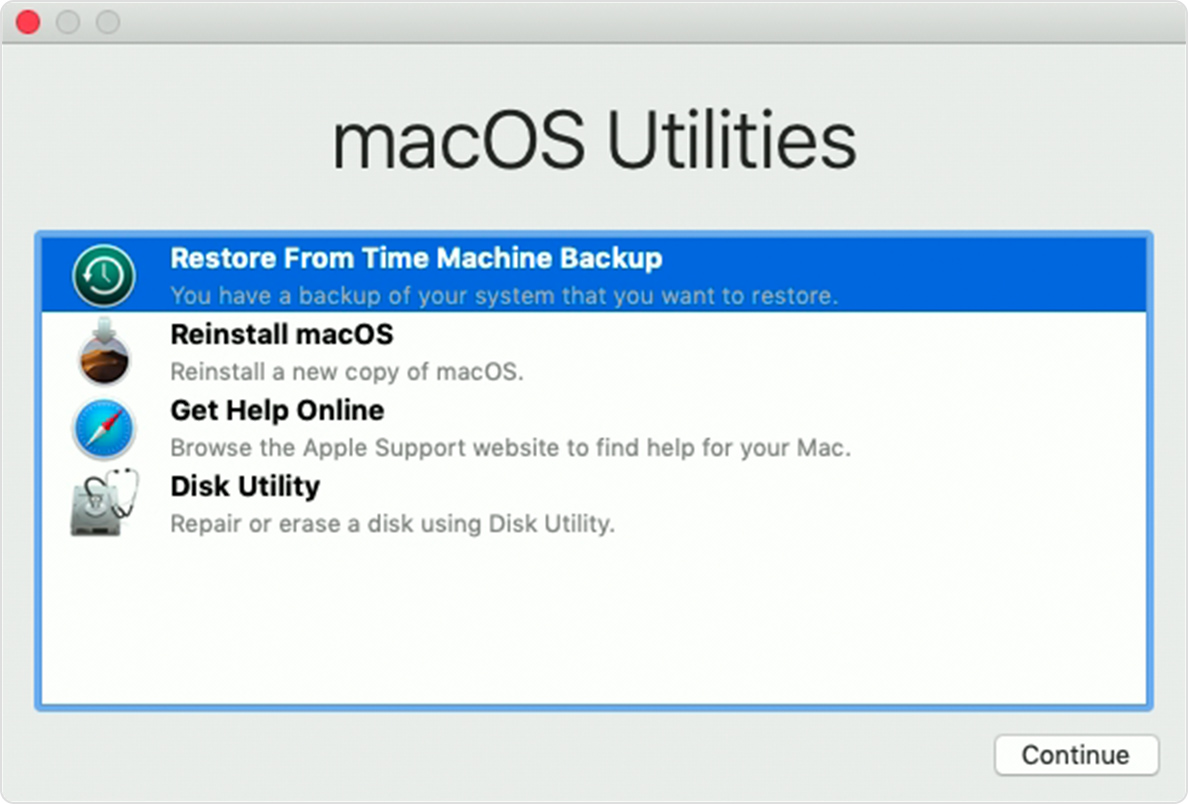
- When you see the macOS Utilities window, choose the option to restore from a Time Machine Backup.
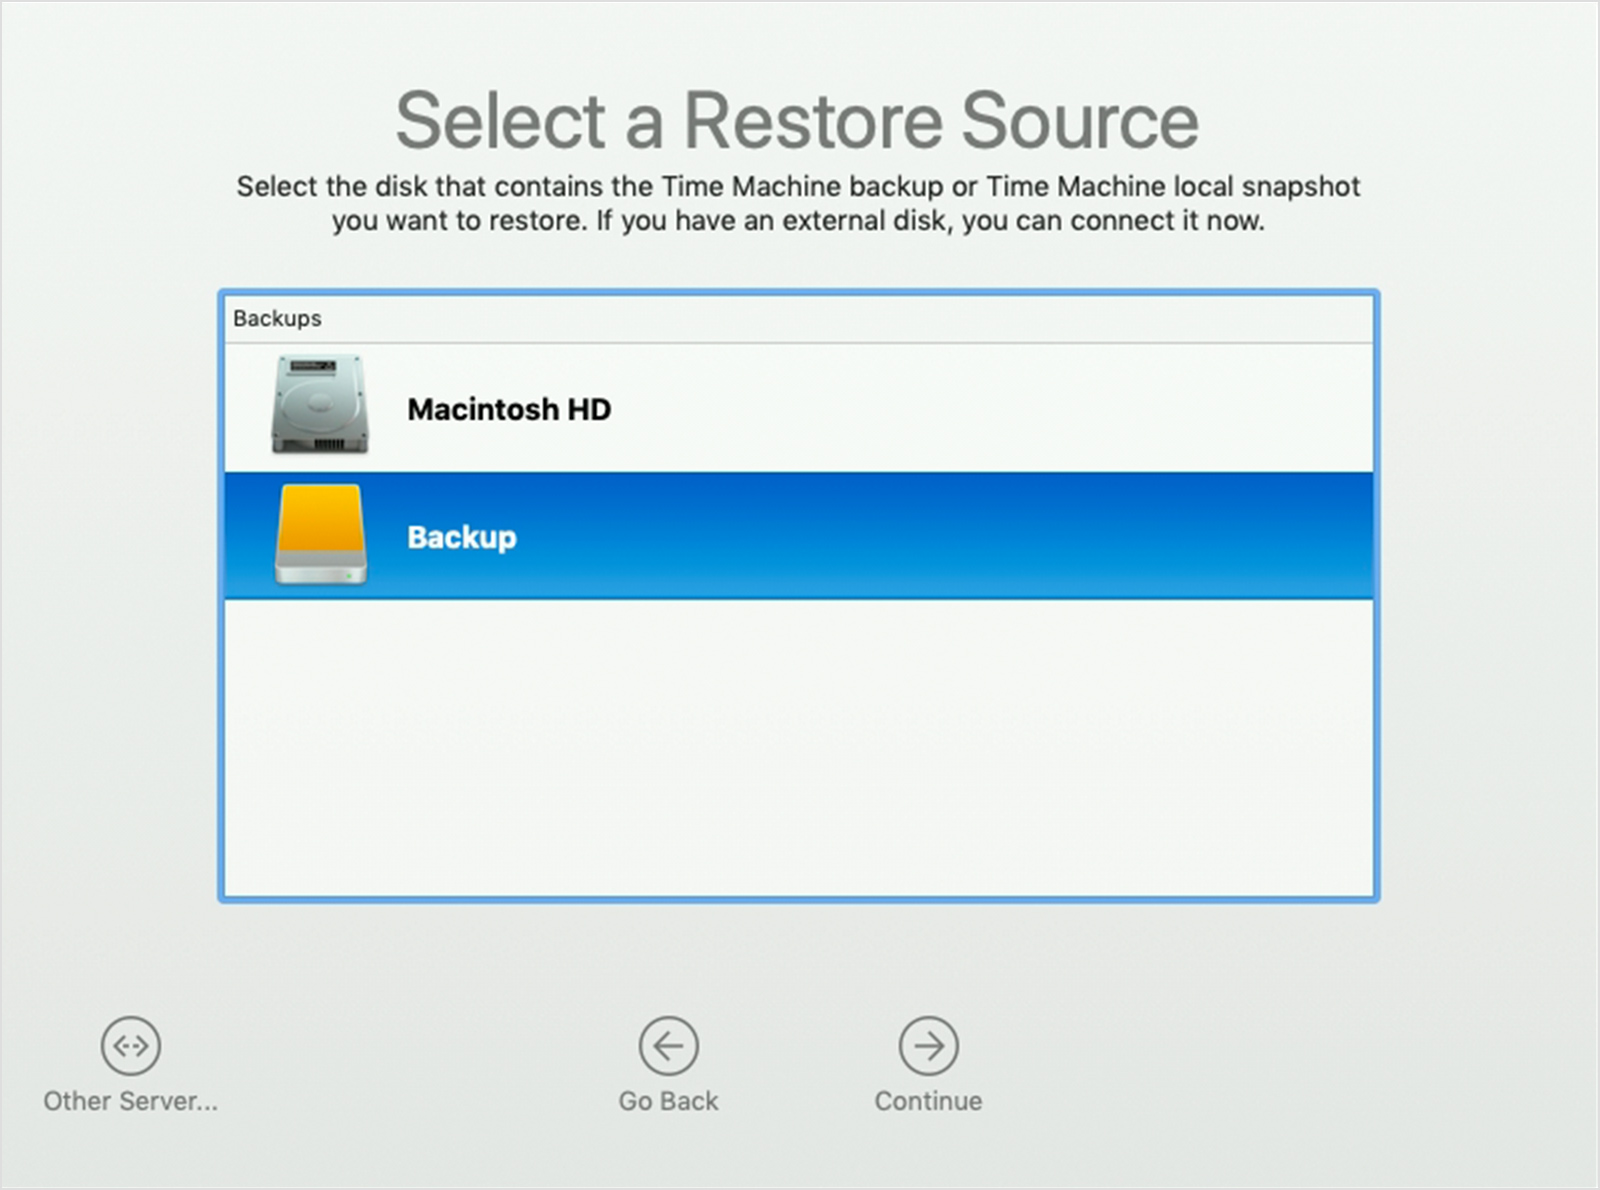
- Click Continue until you're asked to select a restore source, then select your Time Machine backup disk. Or select your startup disk (Macintosh HD), which might have a local snapshot you can restore from.
- Click Continue. If your disk is encrypted, you're asked to unlock the disk: Enter the administrator password you used when setting up Time Machine, then click Continue again.
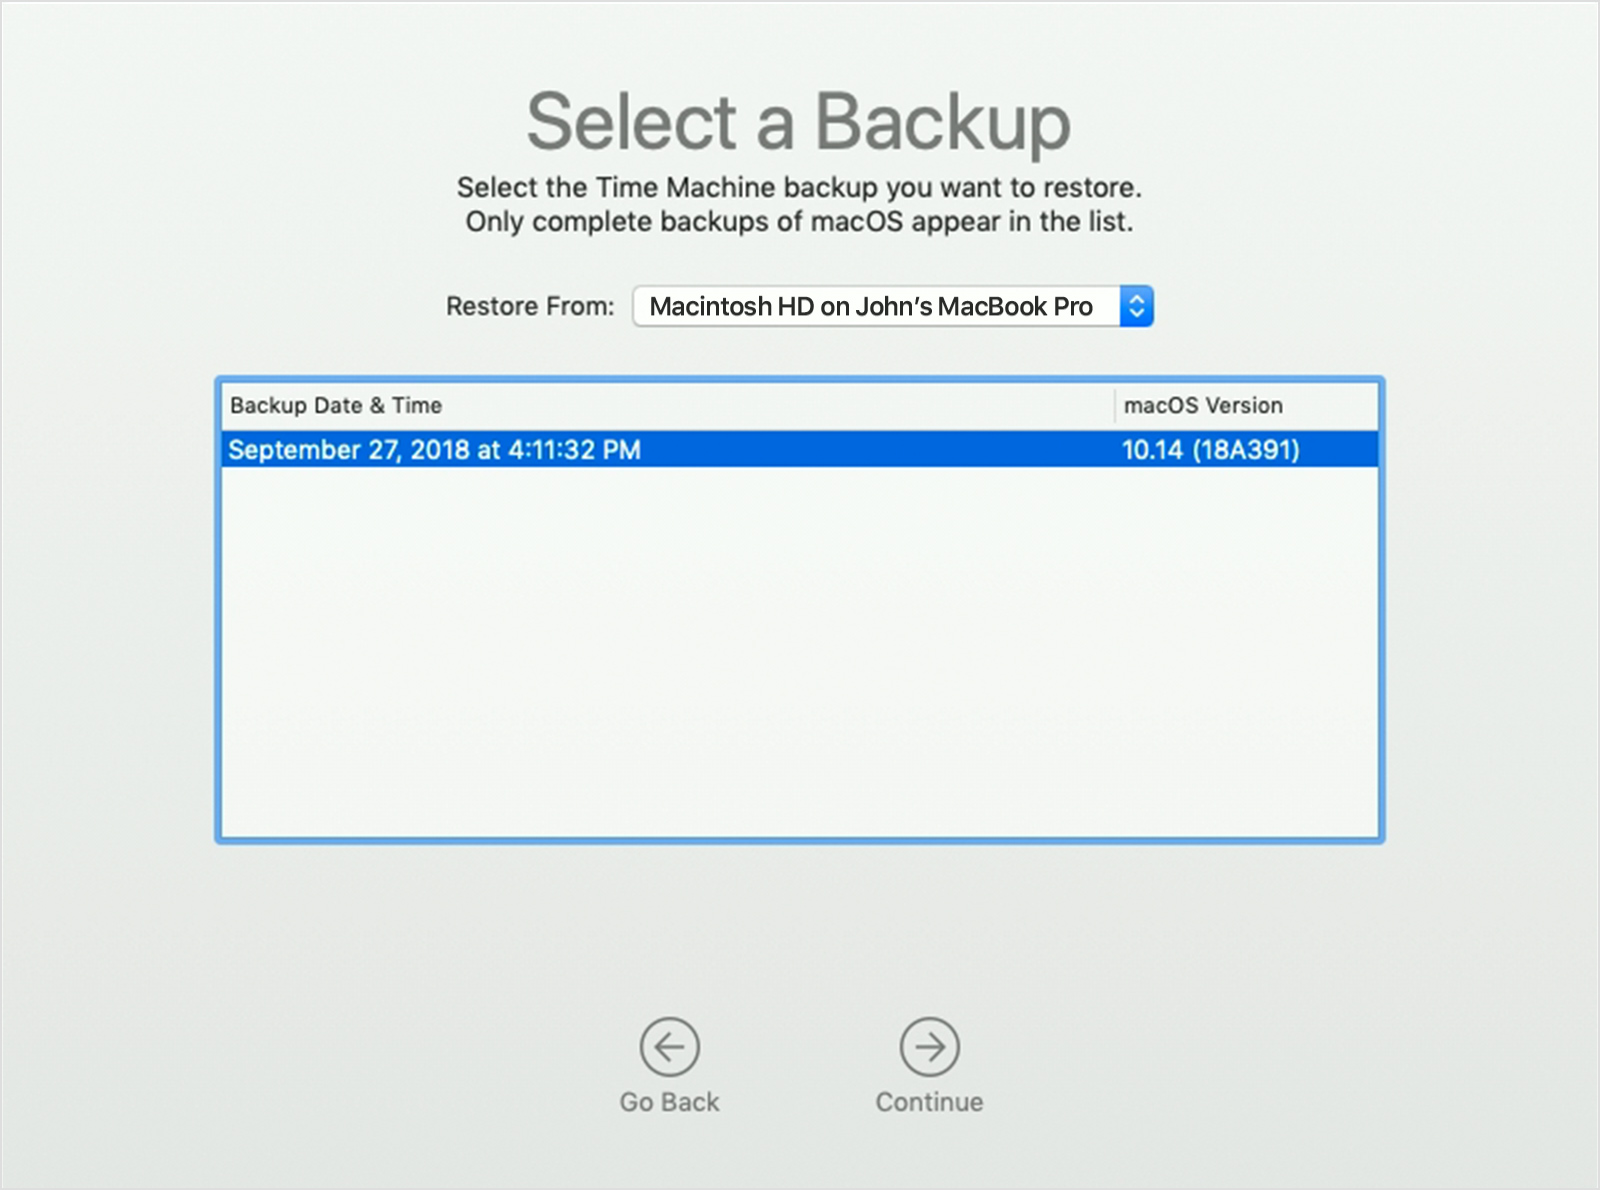
- choose a backup, if available, then click Continue.
- Pick up a destination disk, which will receive the contents of your backup. If restoring from a local snapshot, you aren't asked to select a destination.
- Click Restore or Continue. If your Mac has FileVault turned on, you're asked to enter your administrator password to unlock the disk.
- When it’s done, restart your Mac.
Learn more
- Make a backup of your iPhone, iPad, and iPod touch
- Make a Back up of MacBook with Time Machine
- Restore your Mac from a backup
- Other ways to back up and restore files
- If you back up to multiple disks, you can switch disks before entering Time Machine. Press and hold the Option key, then choose Browse Other Backup Disks from the Time Machine menu.
- To exclude items from your backup, open Time Machine preferences, click Options, then click the Add (+) button to add an item to be excluded. To stop excluding an item, such as an external hard drive, select the item and click the Remove (–) button.
- If using Time Machine to back up to a network disk, you can verify those backups to make sure they’re in good condition. Press and hold Option, then choose Verify Backups from the Time Machine menu.
- In OS X Lion v10.7.3 or later, you can start up from your Time Machine disk, if necessary. Press and hold Option as your Mac starts up. When you see the Startup Manager screen, choose “EFI Boot” as the startup disk.
TopTek System (TTS) is an Apple Authorized Service Provider. All of our technicians receive Apple training and they deliver the same high-quality service with genuine Apple parts and the proper tools, which provided and recommended by Apple, to open and close the device therefor the repairs are backed by Apple. Genuine Apple Parts are critical to a quality repair. Visit us to make sure you get your product back working the way it should.
To get service for your MacBook, you can call us or make a reservation online.
There’s no charge if your Macbook issue is covered under warranty, AppleCare+, or consumer law.
Not sure if you’re covered? Check your coverage by entering your Macbook serial number.
Most common MacBook Air/MacBook Pro Repair Services:
- MacBook Broken Screen Replacement
- MacBook Logic Board Replacement
- MacBook Mag safe 2/USB C (charging port) Replacement
- MacBook Battery Replacement
- MacBook Keyboard/TrackPad Replacement
- MacBook Water Damage Repair
